
Adding a new User
How to Add a New User
Adding a new user allows you to give another person access to your JGID account. You can create their profile immediately and choose whether to invite them to log in now or later.
Before You Start
If you're still setting up your account or training your team, you don't need to invite users straight away. You can create their profiles first and send invitations later when you're ready.
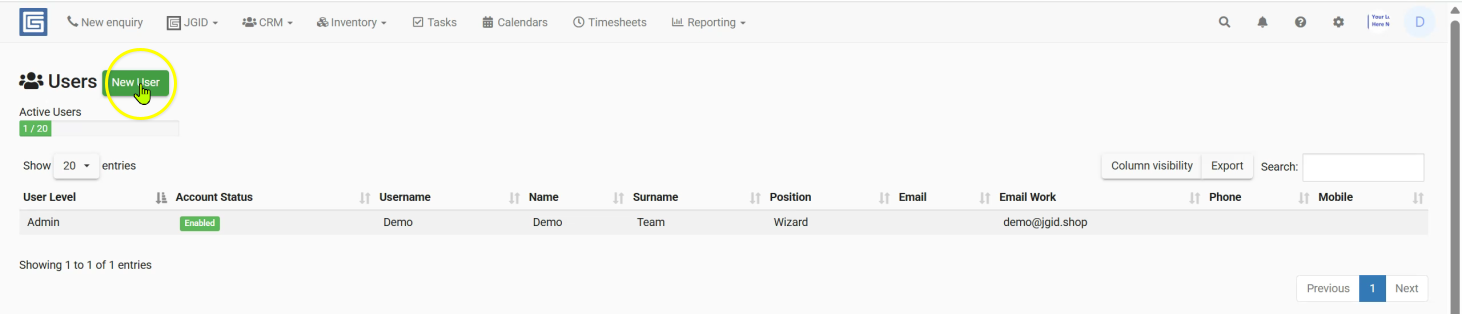
Step 1 – Open User Management
- Click the Settings (⚙️) icon in the top-right corner.
- Select Users & Staff.
- Click New User in the top-left corner.
Step 2 – Enter the User's Details
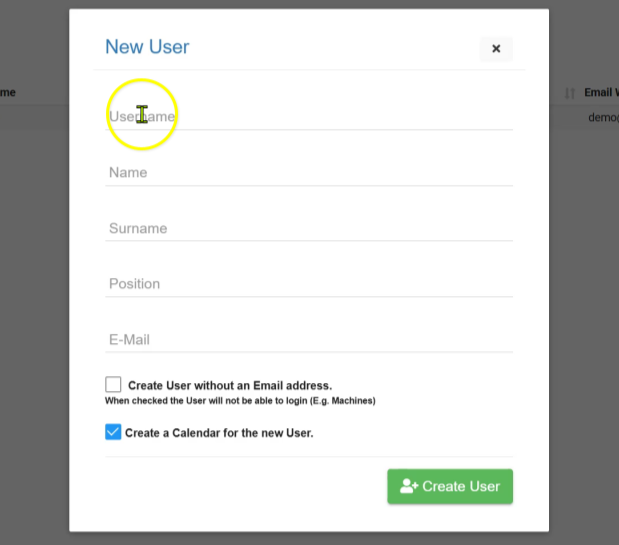
Complete the user's basic information:
- Username – Choose a unique username (for example, JoeB for Joe Blogs).
- First Name
- Surname
- Position (for example, Technician, Supervisor, Office Administrator, etc.)
Step 3 – Choose Whether to Invite Them Now
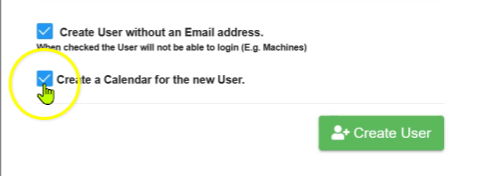
If you don't want the user to log in yet, tick:
Create User without an email address
This is recommended if:
- You're still setting up your account.
- You're learning how to use JGID.
- The employee isn't ready to start using the system yet.
When this option is selected, you won't need to enter an email address.
Tip: You can always add the user's email address and send them an invitation later.
Step 4 – Keep Calendar Creation Enabled
Leave Create calendar for the new user ticked.
Every user should have a calendar created, even if they won't be logging in immediately.
Their calendar is used for scheduling jobs and allocating work in the future.
Step 5 – Create the User
Click Create User.
The user profile has now been created.
Enable the User
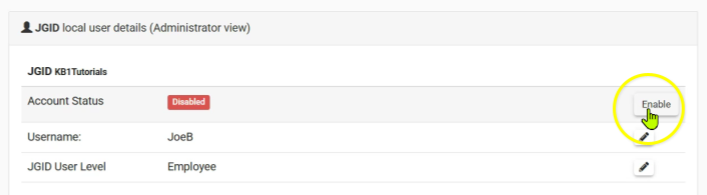
Newly created users are disabled by default.
Before they can log in, you will need to:
- Open the user's profile.
- Enable the user account.
Until the profile is enabled, the user cannot access JGID.
Choose a User Level
Every new user is automatically created with the Employee permission level.
You can change this to a higher permission level if required.
Available user levels are:
| User Level | Description |
|---|---|
| Employee |
Standard user with the lowest level of permissions. Can view only their calendar & jobs Clock in & out, sign JHA & DLS No financial visibility |
| Supervisor |
Can view all calendars Can edit calendar events and schedule jobs Can edit the Checklist & JHA No financial visibility |
| Manager |
Full Financial Visibility, including Quotes, Jobs & Invoices Can use all of JGID's features Can view only a list of users, names, phone, email |
| Admin | Full access to the account and all settings, including viewing, editing, enable/disable or invite new user profiles |
Note: Employee is always the default user level for newly created users.
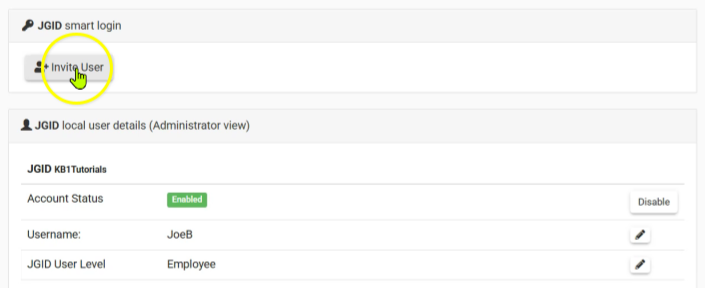
Invite the User
Once you're ready for the user to start using JGID:
- Open the user's profile.
- Add their email address (if it hasn't already been entered).
- Select Invite User.
- The user will receive an invitation email allowing them to create their password and log in.
Frequently Asked Questions
Why can't my new user log in?
New users are created disabled by default. You'll need to enable their profile before they can log in.
Can I create users before I know their email address?
Yes. Select Create User without an email address. You can add their email and invite them at any time later.
Should I create a calendar if the user isn't starting yet?
Yes. It's recommended to always leave Create calendar for the new user enabled so they'll be available for scheduling when needed.
What permission level does a new user receive?
Every new user is automatically assigned the Employee user level. You can change this to Supervisor, Manager or Admin at any time.
Summary
To add a new user:
- Go to Settings → Users & Staff.
- Click New User.
- Enter the user's details.
- (Optional) Select Create User without an email address.
- Leave Create calendar for the new user enabled.
- Click Create User.
- Enable the user's profile.
- Assign the appropriate user level.
- Add their email address and send an invitation when they're ready to begin.